Panorama jak se dostat k cestě PANORAMAt
JASON DENNING - bag
inspirace pano
více + print:
http://giftslessordinary.com/Jason-Denning
a jak se ale odlišit?
-----------------------------------------------------
1)
Camera Pentax 67 je malá
Mamiya RB67 PRO
Super věc - Mamiya RB67 PRO SD 120/220 6x7 Power Drive Roll Film Holder II
Camera 6x9 je také malá
-----------------------------------------------------
2)
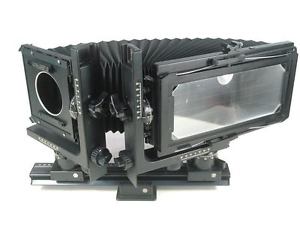
Foťák 6x24 už je rozhodně zajímavý! ale za tu cenu by se už dala postavit / sehnat large format
Gaoersi 6x24 cm Large Format Panorama Camera
US $1,150.00
Approximately 28,812.67 CZK
US $1,599.00
Approximately 40,062.14 CZK
 Gaoersi 612 / 617 panorama camera back
Fotoman 624 Panoramic Camera Body Kit
FOTOMAN WIDE FORMAT CAMERA BODY W/ 120mm Cone, Film Holder & Aluminum Case
-----------------------------------------------------
3)
LARGE format Camera - je prostě o něčem jiném!
a 4x10 nebo
5x14 by byl ideál!
ale rozumná hmotnost
Featured Comment by Jim Galli: "I had our friends at Chamonix build me a
5x14"
camera. Does that make me in the running for most contrarian? The idea was to use 5" Aerial Recon Panatomic X stored in my freezer for 30 years into the long film winter."
záloha a zdroj:
Jim Galli's 5X14 Chamonix camera. Photos © jim galli
10-30-2007. No use without permission. For images
http://tonopahpictures.0catch.com/Chamonix5X14/ChamCam514PIX.html
photos from
Chamonix
5x14"
http://tonopahpictures.0catch.com/Chamonix5X14/Chamonix_5X14.html
5X14 Chamonix 6 holders & film for your first 100 pictures
Professional Custom Made Bellows For 4x10 Large Format Camera Black Or Red Color
US $149.99
Approximately 3,757.92 CZK
4X10 inch format frame for Horsman L series single rail view camera NEW
Price:
-----------------------------------------------------
4)
A co foťák třeba nějak postavit?
a) z staršího neúplného kusu
b) dle návodu - nový
2 X Thumbscrew knobs male M4 M5 M6 Knurled camera tv jig computer saw drill
Screw knobs male M4 M5 M6 Knurled brass
Stainless Steel Brass Big Head Knurled Thumb Screw (M3 M4 M5 M6)
Knurled Thumb Screws DIN 464
M3 Brass Knurled Screw Suppliers and Manufacturers
M3 M4 M5 M6 M8 Zinc Plated Carbon Steel Knurled Thumb Nuts Metric - eBay
Industrial Brass Fasteners Manufacturer from Jamnagar
Brass Solid Knurled Nuts Thumb Nuts Insert Nuts Blind Hole M6*8*12mm
Lot Of (36) 8-32 Brass Knurled Head Thumb Screws Knobs
KNURLED THUMB NUTS STAINLESS STEEL HAND GRIP KNOBS M2 M2.5 M3 M4 M5 M6
Motor Gear 12T w/ M4 Grub Screw
SmallRig Screw Adapter w/ Female 3/8" to Male
sprite-screws-head-style_Hex Knurled
...is attached to a brass plate that runs in a channel in the extension slide. Tightening the screw clamps the plate to the extension slide...
Extension slide - Hand & Stand
Camera Brass Fittings plates
Hinges - Making cameras
brass housing inserts
The part that contains the (hinge) pins is thicker than the rest of the (hinge) leaves so the mortise that is requred for these has two different depths
The HobbitHouse Ilustrated Glossary of Woodworking terms
Large format camera foldable "hinges"
www.google.com/search?q=Large+"Camera"+Building+hinges+brass
Hinges - Making cameras - Trunnions
http://makingcameras.com/hinges
Deardorff Front Swing Assembly Conversion Kit for V8 Deardorff 8x10 Camera
gopro cage and mount adaptor gold - splash housing inserts
Final stages of the front support
The above picture shows the camera front mounted on the focusing slide. The movements it is required to make are controlled by five locking knobs. A and B control the rising front and are smaller than the others. The reason for this will become clear later on.
Knobs C and D have two functions they lock the slotted stay onto the front support so that the front can be folded forwards, pivoting on F and G when closing the camera and they also allow for a swing movement to the front in relation to the camera back. Notice the spacer arrangement on these joints. They are necessary to avoid the slotted strut fouling the rising front controls A and B as the front is moved forward to close.
The last control knob is E. This when tightened locks the whole front unit onto the focusing slide...
camerapedia wikia.com wiki
Folding
Exceptions without bellows are a few old camera designs which were foldable due to a set of hinges, for example foldable variants of the sliding box camera
earlyphotography.co.uk
early photography.co.uk
Sanderson Cameras
www.earlyphotography.co.uk/site/sanderson.html
Billcliff large format wood camera with a Ross Rapid Symmetrical lens and one book-style plate holder that will take two exposures up to 8″ x 10″ in size
eager - Asanuma King 1
Rafael Garcia
21-Dec-2008, 07:46
If you will be making your own emulsions, why not go 5x7? The old half-plate cameras will do both 4x5 and 5x7 if you build the backs for them, and 5x7 is a lot better size for contact printing!
http://i67.photobucket.com/albums/h285/ragc01/eager.jpg
This is my Japanese-made English Half-Plate camera, an Asanuma King 1, which I do 4x5 and 5x7 work with. There were some makers of similar cameras in India.
Mine cost me around $140.00 US plus the lenses. I did eventually have the bellows replaced, although the original bellows were still good.
Edited so the photo would show up
www.largeformatphotography.info/forum/archive/index.php/t-44104.html
Handmade View Camera
folding large format camera
Mahogany and brass folding camera withThornton Pickard Snapshot lens/Shutter
-----------------------------------------------------
5)
polotovar - stavebnice
Robert J Harvey-technika-2 - Bulldog Large Format Self Assembly Cameras
Review of a 10” x 8” Bulldog Camera
Bulldog 10x8 Self Assembly Large Format Camera Kit
Do It Yourself
Mere words cannot describe the intense satisfaction that building your own camera provides. The Bulldog can be put together in a matter of hours (spread over a few days, as the glue has to dry), and requires only very basic tools. Your end result is a fully functional and completely gorgeous 4x5 or 10x8 field camera body.
The Affordable Route
Outside of the intense feelings of satisfaction that you’ll experience, there’s another concrete benefit to building your own 4x5 or 10x8 camera. The price! As with any professional equipment, large format bodies, even used ones, can be shockingly expensive. With the Bulldog, you’ll have a fully capable camera body for a mere fraction of the price.
10x8 Overview
• Size (assembled): Width: 36cm, Height: 38cm, Depth: 32cm
• Weight: (without lens or back): 3.3 kg
• Format: 10x8
• Max extension: 360mm (ground glass to lens panel)
• Min extension: 20mm (ground glass to lens panel)
• Max rise: 80mm, Max fall: 80mm, Max shift: 80mm
• Lens panel: Standard Sinar panel
Features
Premium construction materials
Each Bulldog camera is composed of about 150 parts. Its main body is composed of MDF (Medium-density fibreboard), a strong engineered wood product. Its knobs and body fittings are made of sturdy brass. Once assembled, this camera is sturdy and extremely usable. It’s in it for the long haul.
Included Pinhole plate
Right out of the box, you can start shooting pinhole shots immediately with the Pinhole plate. Pinhole images are soft and dreamy – and yield an enormously wide image with no barrel distortion. Shooting such an image on large format yields a richer and sharper print then 120 or 35mm film can create. I tell you, once you cradle the majesty of an enormous large format piece of film in your hands, then nothing else compares.
Standard lens mount
The bulldog accepts nearly every variety of standard large format lenses. The used market (online stores and offline shops) is absolutely full of them – and you can score an affordable one for £100 or so. They generally come with a metal “lens plate,” and you mount both pieces right onto the front of your camera. This allows you to choose whether you want to shoot wide angle, normal perspective, or telephoto.
Standard large format back mount
You’ll also need a place to keep your film. With large format cameras, this is done via a “camera back” which slips in front of the ground glass focusing screen. Again, these backs are inexpensive and plentiful on the used market. You also have the ability to use the instant Polaroid 545i back – which allows you to shoot huge, instant, and richly detailed Polaroid color or b&w shots.
Ground glass viewer
Each Bulldog kit includes a gorgeous hunk of ground glass. This goes on the rear of your camera and allows you to compose and focus your image. Although the image is inverted, you’ll find that this huge glass frame makes it much easier to compose your shot than squinting through a little viewfinder.
Lightweight & portable
Okay, so this feature is RELATIVE. A finished Bulldog isn't going to fit in your pocket, but it’s fairly compact and portable when compared to the other massive 4x5 cameras our there. Large Format lends itself especially well to on-location landscape and cityscape photography – and your wrists, arms, and back will thank you for choosing this lightweight wooden option.
Classic & Educational
As our product pictures show, this camera is simply gorgeous. It has classic lines, and an old-school look that cannot be beaten. Moreover, its wooden exterior is easily painted or stained – so you can customize it however you like. The educational bit comes from its assembly. Putting together your own camera yields a priceless hands-on lesson about the basic functions of a camera. As you get more and more into photography, this will give you real insight about how focal lengths, apertures, and shooting angles function and interact.
-----------------------------------------------------
6)
oslovit výrobce a koupit nějaký polotovar
Fomapan - informace o filmu a zpracování
Vyvolávací doby černobílých filmů Fomapan v doporučených vývojkách Foma
Fotit na film? A to jako proč?
…a právě proto mám velkoformátový fotoaparát z roku 1929
Ferrania P30 se vrací
Fomapan
ploché (listové) filmy
pano
panorama