Show NIK Software
Landscape Photography Show NIK Software with Special Guest Dan Hughes
Landscape Photography Show Episode #26 David Marx on Lightroom Editing
Nik Software Lessons
Enhancing the Fine Art Image using Silver Efex Pro 2 with Tony Corbell
Saturday, November 30, 2013

DIFFRACTION Nikon D800
DIFFRACTION Nikon D800
DIFFRACTION
MOTION BLUR
NIKON D800 DYNAMIC RANGE
NOISE – ISO PERFORMANCE
Brian Tobey
So where does diffraction begin to impact the D800? Well first we need to know the pixel size. This can be approximated by dividing the sensor size by the number of pixels on a per axis basis.
THE MATH
According to these theoretical approximations, we conclude that ideally we would want to shoot the D800 at f/8 or below in order to prevent diffraction from softening pictures. However, the calculation is flawed in that in accounts for only a single frequency. In our case, we selected 500nm wavelength, which is the color green, the most sensitive to our eyes, to replicate daylight. However, daylight has many colors or frequencies and therefore we must consider the entire bandwidth. This calculation becomes more complicated, but when analyzed across a bandwidth, diffraction becomes more forgiving, which means we can shoot the D800 up to f/11 and be perfectly satisfied with the results!
Note that recently announced Nikon D3200 has an even denser sensor, with 24.2 MP on a DX size sensor. It becomes diffraction limited around f/6.3. This is of more concern than the D800, as most DX lenses are not optimal until f/8. To maximize the quality of the D3200, I’d shoot at f/5.6 and stick with the Nikon 35mm f/1.8G or 50mm f/1.8G. I have always been a fan of those lenses. And if you notice, Nikon shot a lot of the sample images at f/5.6 using some expensive glass.
dynamic range
Thursday, November 28, 2013
Ostrost fotografie
Ostrost
Ostrost, to je oč tu běží
U fotografií rozlišujeme dva typy ostrosti. Je jím obrysová ostrost v zásadě jako aplikace neostré masky. Ta vytváří dojem ostrosti tím, že tmavší část v okolí hrany více ztmaví a světlejší část v okolí hrany více zesvětlí. U barevné hrany totéž platí o sytosti hraničních barev. To způsobuje efekt, kdy jsou obrysy ostré a prostor mezi nimi neostrý, často bez kresby.
Druhý typ ostrosti, ten důležitý, je kontrast detailů. Vytváří ostrost fotografie jako celku a zásadně ji ovlivňuje právě objektiv, který musí přenést detaily a senzor a ten je musí zaznamenat. Bodový zdroj světla se zobrazí vždy jako ploška. Když je dostatečně malá, naše oko ji nevnímá a je vše ostré. Čím menší je senzor, respektive obraz na senzoru, tím více se musí zvětšit a plošku už vnímáte jako neostrost. Detaily jsou pak méně patrné.
Pokud přejdete z kompaktu k pokročilejšímu přístroji, nastavte si vyhovující parametry záznamu JPEG snímků ve fotoaparátu nebo při následném převodu z RAW souborů v konvertoru. Výchozí nastavení bývá spíš konzervativní s nižšími hodnotami ostrosti, kontrastu a saturace. Camera RAW, kterou používám, obsahuje původní implicitní nastavení parametrů převodu pro každý podporovaný model fotoaparátu. To ovšem neznamená, že to jsou „správné“ hodnoty, ale pouze jedny z možných pro interpretaci RAW dat.
více Proč může být přechod k pokročilému fotoaparátu rozpačitý
Jak na zaostření neostrých a rozmazaných fotografií
Každému fotografovi se už jistě podařilo zkazit fotografii rozmazáním – ať už pohybem fotoaparátu při expozici, nebo nesprávným zaostřením. V takové situaci ani programy jako Photoshop nepomohou a při sledování různých kriminálek si většina z nás ťuká na čelo. Naštěstí najdete na internetu pár užitečných prográmků, často děl nadšenců, které opravdu pomohou takové chyby zkorigovat... více
Conceptual Glamour Photography
Conceptual Glamour Photography
Master - Tatiana Mertsalova 500px


Pin boudoir
Michael Grecco - The Sexy Beach Glamour Fashion Shot 6/1 9am-6pm
Silvano Caliaro, Switzerland, waterfall
Lines and other shapes
Michael Woloszynowicz


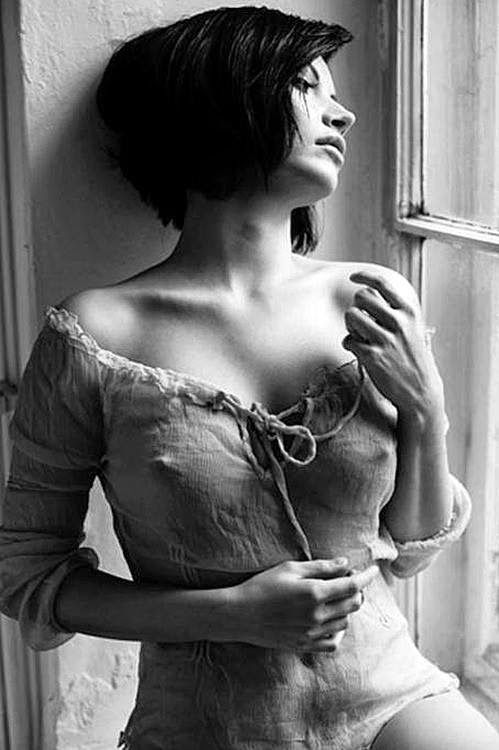


video GLAMOUR2
OAFF 2015 - PHOTO AWARD
Monday, November 25, 2013
Posing Academy Photography Walk Through a Wedding
Posing Academy Photography
Posing AcademyPhotography
Christian Tudor Academy of Photography
Walk Through a Wedding
500px.com Wedding
10 wedding posing ideas for the bride, tips and tricks for great bridal portraits
wedding photography posing guide - the bride's eyes - best bridal photo ideas
learn how to pose a women with no modelling experience
Female model posing tips
Posing Everyone! Jerry Ghionis
Back to Basics: Wedding Photography
In Camera Artistry: Using Any Light Source
How to Pose Wedding Photography, Photo Workshops, Jason Lanier Photography, Camaro SS, Gwen Garci
female model posing guide and techniques - see me in action - studio session
male posing tips - how to photograph a man model
Mike Browne
5 PHOTOGRAPHY COMPOSITION TIPS, including 70+ examples with Michelle Doherty Photography
Photography Posing Tips, Doug Gordon Workshops Photography Posing Rules of the Female Face
Wedding Photography Posing, Doug Gordon Flow Posing
Photographing the Whole Family - The Wedding Project with Doug Gordon
Good Light vs. Bad Light with Doug Gordon
Amazing Wedding photo shoot! Night shoot around London posing and light
PocketWizard AC3 Zone Controller pro Nikon
Manuál rozsah: Auto = +/- 3 kroky - 1/3 indikátor: LED - zelené světlo
Easy Off-Camera Flash for Wedding Photography with Cliff Mautner
Amanda & Evan's Wedding! Night and Day Photography Fusion
Follow Us on a Shoot: Creative Wedding Photography - posing and light
Saturday, November 23, 2013
32 bit HDR feature compare to Photomatix by Serge Ramelli
32 bit HDR feature compare to Photomatix by Serge Ramelli
32 bit HDR feature compare to Photomatix by Serge Ramelli
11m10s


Lightroom 5 or older do not have built-in merge HDR. But you can merge to 32-bit HDR in Photoshop, save it as TIFF and open it in Lightroom. The rest are exactly the same as using Lightroom 6 or above.
Once you have opened Photoshop, go to File > Automate > Merge to HDR Pro. Browse and select the images you want to merge and click ok.
Remember to check the box for Remove Ghosts and select the Mode to 32-bit.
Click OK and don’t make any adjustments. Go to File > Save As and make sure the format is TIFF. Import the TIFF file into Lightroom and continue editing as before.

source
Experimenting with 32-bit HDR - must try
32-bit HDR In Lightroom: The Easiest And Quickest Way To Create Natural HDR Photographs


Affinity Photo - HDR: 32-bit Editing
Affinity Photo - HDR: 32-bit Editing from Affinity on Vimeo.
Merge to 32-bit HDR Plugin for Lightroom
Price
HDR Labs picturenaut
HDRI Tips and Tricks
FAQ 99 stubs of wisdom from Professor Kirt Witte
32-bit HDR Myths and Methods
The HDRI Handbook 2.0 High Dynamic Range Imaging for Photographers and CG Artists
IMAGE TYPES: JPEG & TIFF FILES
32 Bit HDR Workflow (Photoshop CS 6) Adobe - Videos that are part of the Lightroom 5 Getting Started Series all have an .... color and tonality both globally and selectively – all while still working in 32-bit!
What is HDR and why do we need it?
Working with 32-Bit HDR Images within Adobe Photoshop Lightroom 4.1
HDR Pro in Photoshop CS6 – Using ACR
32 bit HDR file editing; is this goodbye to tone mapping?
flickr Photo-realistic HDR in 32 bit mode using Photoshop
32-bit HDR Toning in Photoshop
10 Bit Output Support
Color depth 8-bit 10-bit 12-bit 14-bit 16-bit 32-bit 64-bit
Working with 32-Bit HDR Images within Adobe Photoshop Lightroom 4.1
Merge to 32-bit Plugin for Lightroom - hdrsoft.com - Free trial - License costs $39
Merge to 32-bit HDR Tutorial
before and after
label:
color
color space
Subscribe to:
Posts (Atom)